
Coaching The Turkish Get Up
by Maggie Elliott
As a full body movement offering real bang for its buck, the Turkish Get Up is great. Whether it’s with a weight overhead or bodyweight, whether it’s with a high bridge or adapted to suit the client, whether it’s a full TGU or partial, it’s an exercise which can be incorporated into most people’s training.
The Turkish Get Up engages the full body but it doesn’t just offer strength and mobility gains. Cognitive benefits come from the cross-lateralisation (left side/right side brain connections), plus it increases proprioception, balance, spatial awareness, and interoceptive awareness. In terms of ‘functional’ movement, it’s one of the originals and it’s also an easy sell to your client. After all, what’s more functional than being able to get up and down of the floor completely unaided? Let alone with a weight above your head… now that feels pretty badass! Saying that, it’s also one of those exercises which can seem incredibly daunting when first introducing it.
This being the case, approaching it in stages and building to the whole movement gradually, including adding a weight will help your client to embrace the Get Up, rather than dreading that you’ll ever mention it again.
So, if you’d like to employ the power of the Turkish Get Up with your clients, here’s my top tips on technique with some (hopefully) helpful adaptative suggestions thrown in along the way.
The set up and press
Without a weight, the TGU begins by setting the body up for the first move. However, with a weight, it begins by rolling the weight safely into the body ready to press. It’s very easy to miss this part but as the weight becomes heavier knowing how to bring that weight safely to the body is very important.
My cue for clients taking hold of a kettlebell, is to approach the bell in an almost foetal position, lying on your side and bringing the bell nice and close like you’re going in for a cuddle! Place the hand picking up the bell deep into the handle and attach the wrist – this prevents them from picking the bell up with their wrist flicked backwards which is just ‘ouch’! They can then use 2 hands to pull the bell close to the body as they roll onto their back.
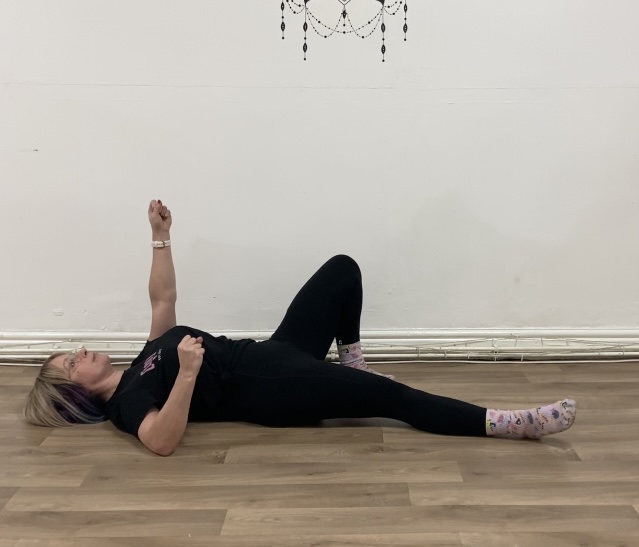
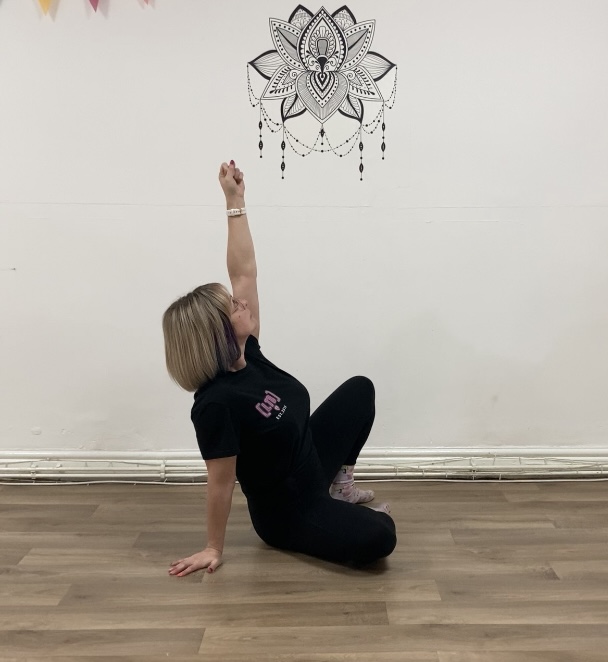
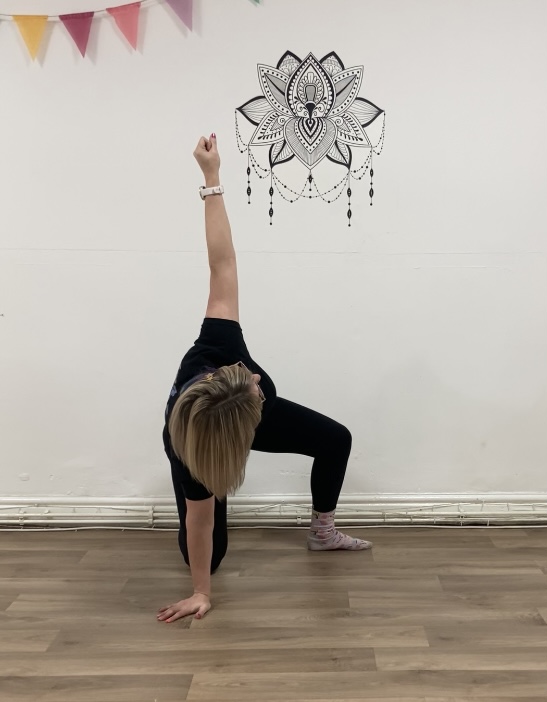
For those who never know which knee to bend, the ‘same leg as arm’ cue is useful with arms and legs on a slight diagonal line from the body. Once the foot of the bent knee is planted, they can chest press the arm (with or without weight) to the starting position. [image 1]
The Roll
I’ve seen this done, and taught, a variety of ways but the most important thing to note is that this first move is NOT a sit-up. It is a roll to the side. Therefore, I usually start with exactly this – a side to side bodyweight roll. Once they know how it feels to pull their knees into their chest and roll from side to side, they can progress to roll onto the forearm and then it’s an easy transition to place the leg and pull on the arm.
This is the second most important element of coaching the roll in a TGU, the push AND the pull. Many people recognise the need to pull on the arm flat to the ground to create the necessary tension to stop on their forearm, but miss out on the additional support the leg pushing on the opposite side provides. In just the same way tension in the squat is created through the legs pushing into the ground and away from each other, the same happens in this part of the TGU. Create this tension and the roll will feel a lot easier.
The seated position
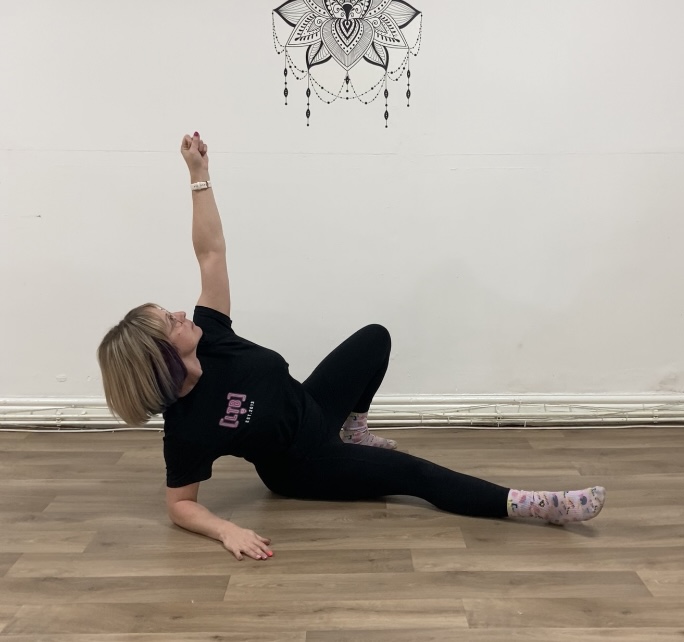
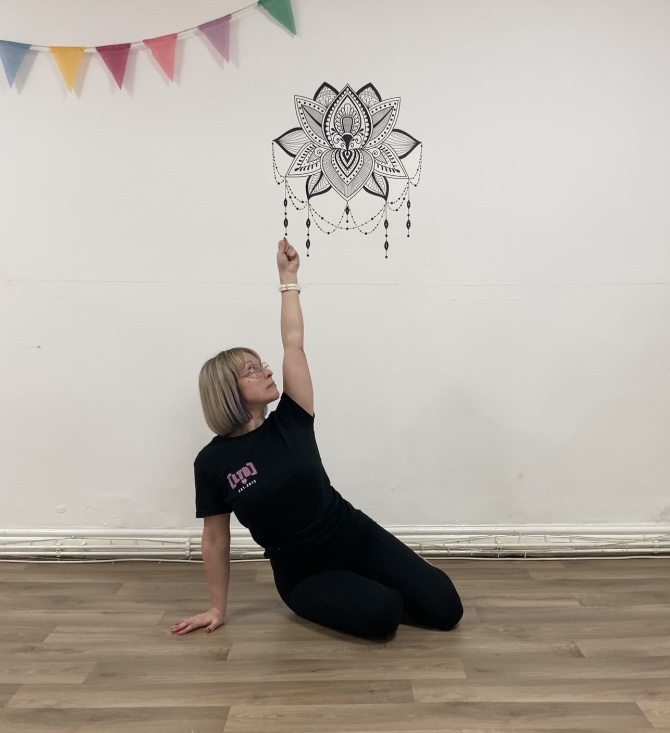
This is a stationary position in the TGU and if you set this up right, the bridge or pull through which happens next is so much easier. Following the roll to elbow, have your client push through the floor to sit tall onto the hand. [Image 3]
 Pause here to enable your client to shift the position of the hand or foot so they feel in a strong position to be able to lift their weight from the floor.
This is also the time to check that the arm holding the weight is alongside their head and not diagonally out to the front, and that the shoulder isn’t lifted towards the ear. This is very common but will inevitably make the weight less stable. Learning, or coaching how, to engage the lats throughout the full exercise, but particularly here, will create a much stronger and stable movement. I’ve found that shrugging and depressing the shoulders here (without a weight) is a great way to get a client to feel the difference for themselves.
The ‘bridge’ or leg sweep
I’ve written ‘or’ here because, often, I’ve found myself modifying the TGU at this point. This will entirely depend on your client base and the purpose for the adding the Get Up into their repertoire, but mostly I find that this is the point where confidence slips. So, to aid this, I either take it out completely or add it in later as a ‘progression’ once I’ve built their competence and self-efficacy.
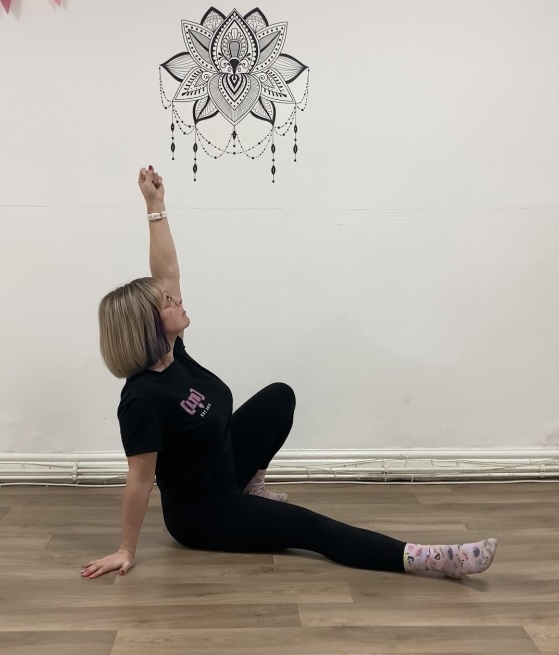
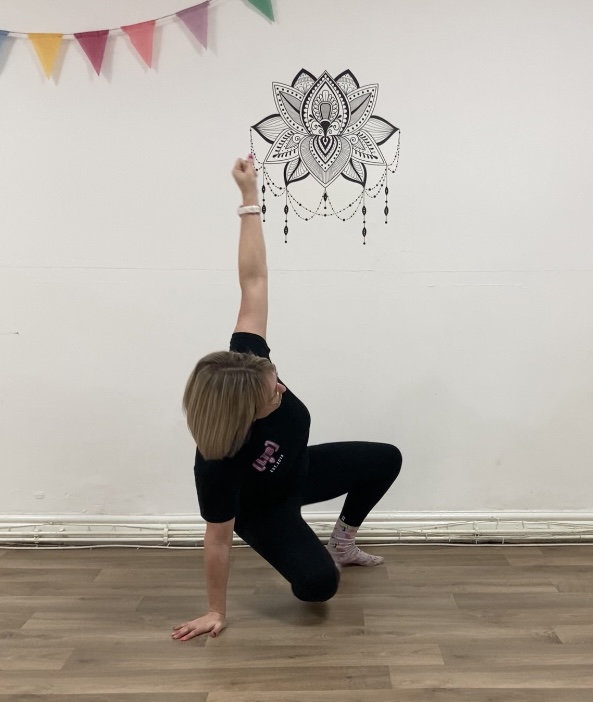
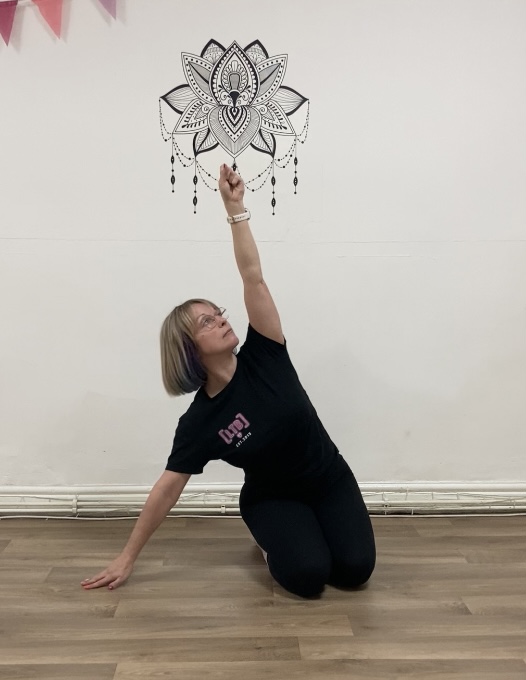
If I am coaching the bridge [image 4]
I do so by drilling it as a movement of its own. Teaching the client to push through the floor with both hand and foot. It’s typical to see the heel lift off the floor at this point in the TGU; if you see this happening, giving the client some feedback that this is happening by holding a resistance band under their heel can help.
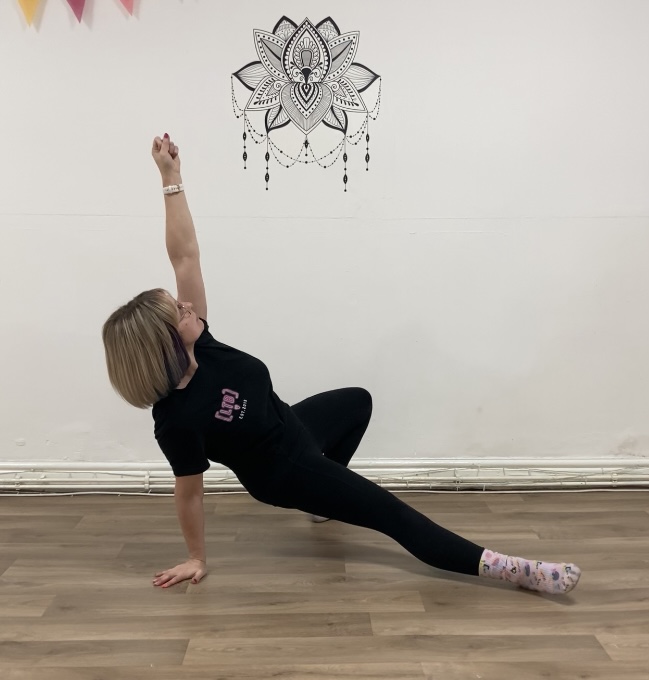
If you’re avoiding the bridge, there are a couple of options. It’s possible for some people to lift the body and pull the leg through without the full hip extension. In which case, it’s simply breaking the movement down for them – bend the front leg so the foot comes towards you [image 5]
push away from the ground with your hand and foot, tilt the chest towards the floor as you slide your leg backwards until you can kneel on it [image 6].
I’ve found this last instruction to be super important. Many times, people struggle to find the windmill position at the end of the sweep through because they haven’t rotated their chest downwards. Of course, this is also the point at which the shoulder also needs to rotate to keep the weight overhead – another reason to only add weight once you’re confident your client can do this otherwise the weight will pull them forwards and down.
For some clients, this lift and slide of the leg may still not be possible, legitimise it in an appropriate way and simply give them the alternative. Once they have come to a seated position, they pull the straight leg in towards the body as described above. However, instead of lifting, have them roll their hips to the same side so they are seated with both kneed bent leaning onto the leg [image 7].
From there, they can use one (or two hands if they are not using a weight) to bring themselves to a kneeling position [image 8].
This misses out the windmill and they will simply raise the knee to a half kneeling position from here.
Half windmill to half kneeling
If you’ve modified the TGU to miss the bridge or the sweep, then you’ll also miss this part. The most important element of the windmill is teaching people how to move out of the position by hinging from the hips, rather than bending from at the torso. [image 9]
The latter will cause the back to arch slightly, whilst if they’re hinging at the hips to come up into the half kneeling position and back into the windmill, you will see them rock towards and away from the foot behind them. Essentially, you’re teaching them to shift their weight, resting on their legs before they remove their hand from the floor rather than pushing off from the floor – one is strong, the other is a recipe for toppling over with a weight above your head!
With the weight shifted away from the hand, moving into a half kneeling position becomes much easier. Again, pause at this point. Check in on the shoulder, check the lats are still engaged and check that the arm is where we want it, alongside the head and rearrange the legs by windmilling the back leg or (more preferable for most clients) moving the front leg into line.
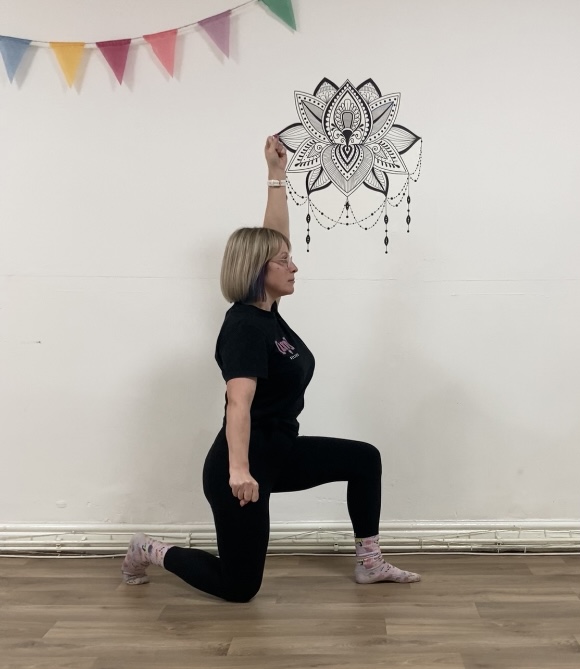
Lunge to standing
Up to this point, throughout every movement, eyes should be on the bell. The only movement in the TGU where you need to look away from the bell is this one. To help with balance, look directly forwards both in the lunge up and back down [image 10].
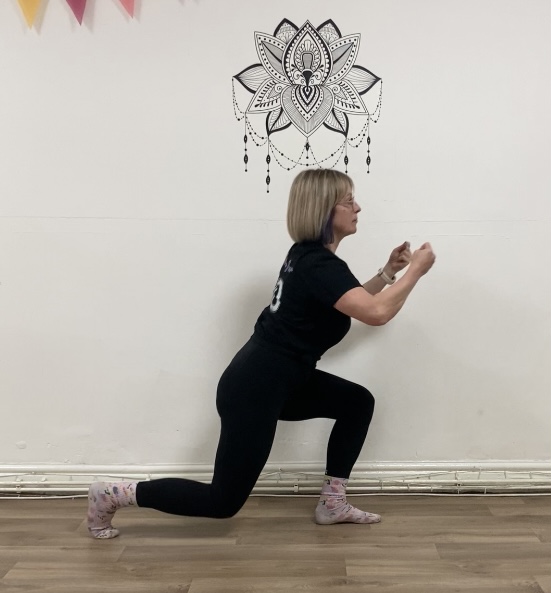
I’ve found the lunge an interesting one to coach as even when people are more than capable of lunging elsewhere in a session, they suddenly lose all ability when it’s in a TGU. I think the main reason being that they’re uncertain how to engage the muscles from the bottom of the movement. It’s for this reason, that I often teach it first by ‘using’ the arms. I provide them with two invisible ropes, ask them to push their front heel into the ground to feel their quad engage, squeeze their bum to feel their glutes engage, flip the toes of the back foot to the ground (so many people try to stand up with a flat foot and it’s soooo much harder), then pull on the ropes. [image 11]
Now they’ve engaged the correct muscle groups but they’ve also added a little forwards momentum; so much so that occasionally I’ve found it helpful if they’re struggling to get them to actually rock back and forth a couple of times before standing – something which many of them have transferred into ‘real life’ helping them get up off the floor without needing to support themselves. Please note… this is a bodyweight drill.
If they can do the rest of the TGU with a weight overhead but the lunge up is causing them issues, bringing the weight to their chest in the rack position can make this accessible.
And now they’re standing!
Obviously, this is a moment for celebration…tears of joy…pats on the back... etc, etc… and then I break it to them that now they have to get back down again!
Approaching the TGU in stages is the best way to approach it and I really do think that the very fact that it feels so complex in the beginning contributes to greater feelings of competency and achievement when they do get it! I know we’ve won when I hear the words ‘Oh…I do love a TGU!’.
Members who are interested in more technique and coaching resources can check out the Movement Continuum and Exercise Library and Movement Solutions Courses or drop me an email if they don't hit the spot. If you are new to LTB you can access these as part of the 2 week free trial.